Creating Return Labels - Label Manager
Label Manager: Select the +Add Extra service under the Extra Services section of the Label Manager.
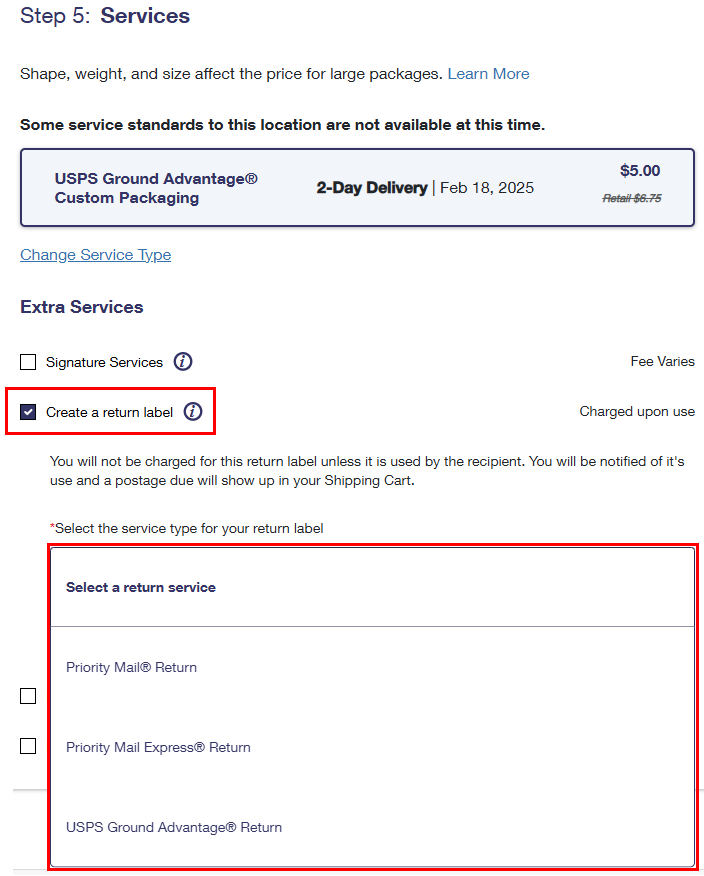
Select the Create a Return Label checkbox, and select a Return Service type from the dropdown. On the Payment Confirmation page, you can print your Return Labels which are printed out with their associated Outbound Label.
Related Articles
Label Manager - Organize Labels
Available Actions in Label Manager Edit Edit a single label or multiple labels directly from your label manager. You can update the label's service and mailpiece type, add extra services, or even change the label's recipient information right from ...Label Manager
The Enhanced Click-N-Ship Label Manager feature helps you organize and store your labels prior to purchase. It offers the following label actions on a single label or multiple labels at once. Enhanced Click-N-Ship Label Manager User Guide Jan. 2025 ...Creating Outbound Labels
The Enhanced Click-N-Ship Label Creation User Guide Feb. 2025 will help you get started creating labels. Click on a link below to open that section of the user guide. Creating a single domestic label Creating a single international label Creating a ...Label Manager and Label Cart
The Click-N-Ship Label Manager feature helps you organize and store your labels prior to purchase. It offers the following label actions on a single label or multiple labels at once. The Click-N-Ship Label Cart feature allows you to review, edit and ...Creating Return Labels - Single Label Creation
Business Shippers can generate return labels for outgoing shipments to their customers. Creating a return label is free and you, the shipper, will only be charged fees once the return label has been used. A returns label cannot be created without an ...