Creating Return Labels - Label Details Page
Label Details Page: Refer to the Label Details page and select Create Return Label.
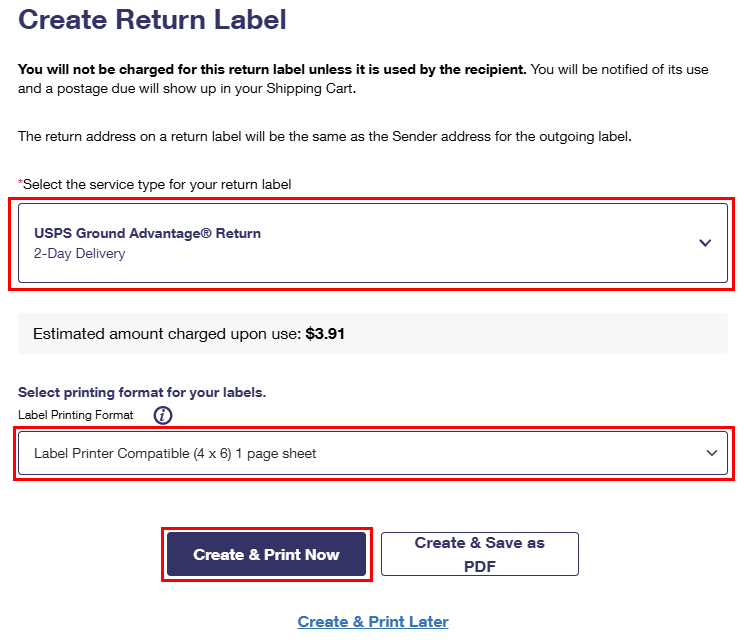
Select a Return Service type from the dropdown, select a Printing Format, and then select Create & Print Now.
Related Articles
Creating Return Labels - Shipping History
Shipping History - Order History Details Page: Select the checkbox of a label within the Order History, select Create Return Label from the Action dropdown, and select Go. Select a Return Service type from the dropdown, select a Printing Format, and ...Creating Return Labels - Single Label Creation
Business Shippers can generate return labels for outgoing shipments to their customers. Creating a return label is free and you, the shipper, will only be charged fees once the return label has been used. A returns label cannot be created without an ...Creating Return Labels - Label Manager
Label Manager: Select the +Add Extra service under the Extra Services section of the Label Manager. Select the Create a Return Label checkbox, and select a Return Service type from the dropdown. On the Payment Confirmation page, you can print your ...Creating Outbound Labels
The Enhanced Click-N-Ship Label Creation User Guide Feb. 2025 will help you get started creating labels. Click on a link below to open that section of the user guide. Creating a single domestic label Creating a single international label Creating a ...Printing Two Labels Per Page
This feature only applies to labels that do not include a customs form. Check the radio button next to the print option, Print labels without receipt (2 per page) to print two (2) upright (2-Up) labels per piece of paper rather than one (1) label and ...